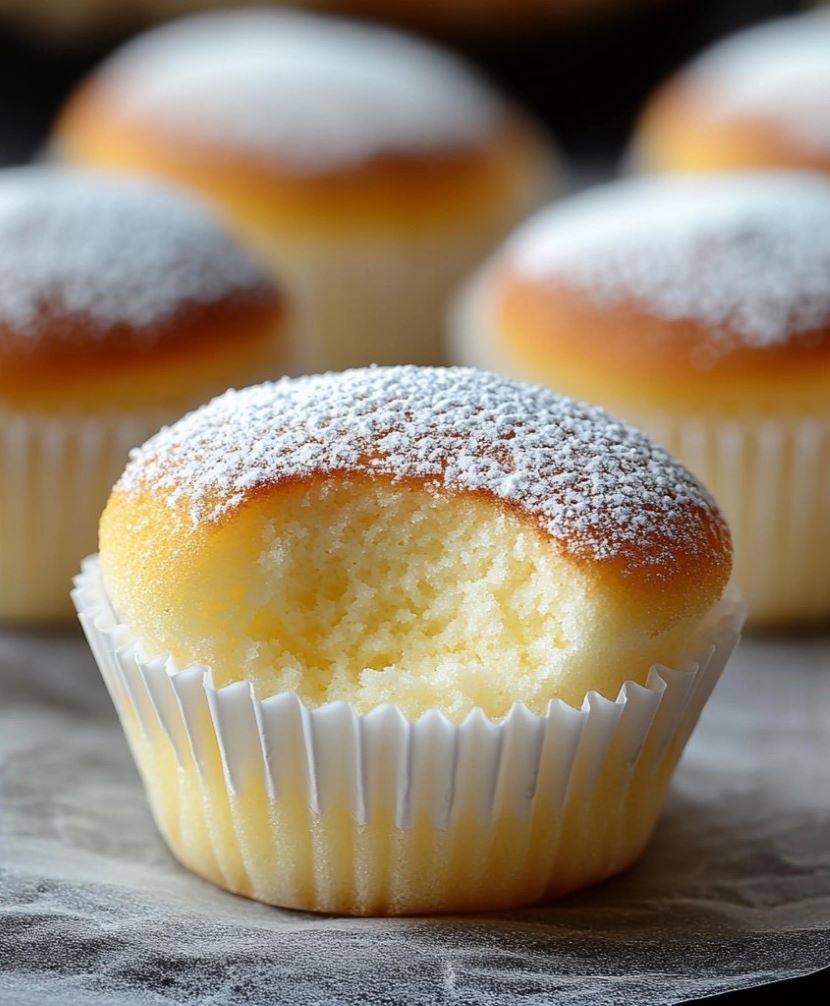
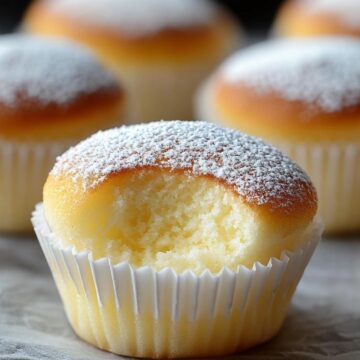
I still remember the first time I tasted a Japanese cotton cheesecake in a cozy Osaka bakery. It was love at first bite—airy as a cloud, subtly sweet, and melt-in-your-mouth soft. The texture was unlike any cheesecake I'd had before, and I knew right then I had to recreate it at home. These cotton cheesecake cupcakes bring that same magical experience, but in adorable, individual servings that are perfect for sharing… or not sharing at all.
These cupcakes have since become one of my most-requested desserts. Light and creamy with just a whisper of tang from the cream cheese, they feel indulgent without being heavy. Whether you serve them plain, dusted with powdered sugar, or filled with a dollop of whipped cream, each bite is a taste of pure bliss. They may look delicate, but don’t let that fool you—they’re easier to make than you might think.
Why You’ll Love This Recipe
- Feather-Light Texture: Unlike dense Western cheesecakes, these cupcakes are pillowy soft thanks to the whipped egg whites and water bath.
- Perfectly Portioned: Individual servings mean no slicing required—just unwrap and enjoy.
- Not Overly Sweet: They have a subtle sweetness that pairs beautifully with fruit or whipped cream.
- Elegant Yet Easy: Impressive enough for special occasions, simple enough for everyday treats.
- Make-Ahead Friendly: They store beautifully in the fridge and taste even better after chilling.
- Customizable: Add a filling, a swirl of matcha, or top with fresh berries for a personal twist.
Ingredients You'll Need
- 200g cream cheese, softened to room temperature
- 50g unsalted butter
- 100ml milk
- 4 large eggs, separated
- 60g granulated sugar
- 50g cake flour (for tenderness; substitute all-purpose flour if needed, but the texture may vary)
- 10g cornstarch
- ¼ teaspoon cream of tartar (helps stabilize the egg whites)
- Powdered sugar, for dusting
- Whipped cream, for optional filling
Step-by-Step Instructions
Step 1: Preheat and Prepare
Preheat your oven to 300°F (150°C). Line a muffin pan with 10 paper cupcake liners. For extra lift and even baking, use high-quality liners and a sturdy muffin pan.
Step 2: Melt the Cream Cheese Mixture
In a heatproof bowl set over a pot of simmering water (double boiler method), melt the cream cheese, butter, and milk. Stir constantly until the mixture is smooth and silky. Remove from heat and let cool for a few minutes before adding dry ingredients.
Step 3: Mix in the Dry Ingredients
Sift the cake flour and cornstarch together to eliminate any lumps. Gently whisk into the cream cheese mixture until fully incorporated and smooth.
Step 4: Add Egg Yolks
Add the egg yolks one at a time, whisking until the mixture is creamy and uniform. This step helps create the rich yet light structure of the cupcakes.
Step 5: Beat the Egg Whites
In a clean, grease-free bowl, beat the egg whites and cream of tartar until foamy. Gradually add the sugar and continue to beat until stiff peaks form. The whites should be glossy and hold their shape.
Step 6: Fold in the Egg Whites
Carefully fold the meringue into the cream cheese mixture in three additions. Use a gentle, sweeping motion to avoid deflating the batter. The goal is to keep the mixture airy and light.
Step 7: Fill and Prepare the Water Bath
Spoon the batter into the prepared cupcake liners, filling each about ¾ full. Place the muffin pan inside a larger baking dish. Fill the outer dish with hot water about halfway up the sides of the muffin pan. This gentle steam helps prevent cracking and creates that cottony texture.
Step 8: Bake to Perfection
Bake for 25–30 minutes or until the tops are a light golden color and the centers are set. Avoid opening the oven door too often to maintain the temperature. When done, turn off the oven and let the cupcakes sit inside for 5 more minutes with the door ajar.
Step 9: Cool and Finish
Let the cupcakes cool completely on a wire rack. Once cooled, you can pipe whipped cream into the center for a creamy surprise. Finish with a light dusting of powdered sugar for that classic, elegant look.
Serving and Storage Tips
These cupcakes are divine served slightly chilled with a cup of green tea or coffee. Garnish with a small mint leaf or a fresh raspberry for extra flair. For storing, place them in an airtight container in the fridge for up to 4 days. They also freeze well—just wrap them individually and thaw in the fridge overnight. To reheat, warm slightly in the microwave for a few seconds, though they’re best enjoyed cold or at room temperature.
Helpful Notes
- Room Temperature Ingredients: Make sure your cream cheese, eggs, and butter are at room temp for a smoother batter.
- Gentle Folding is Key: Take your time folding the meringue—rushing can deflate the air and compromise texture.
- Water Bath Must: Skipping it can lead to dry or cracked cupcakes. Use boiling water for best results.
- Pan Placement: Center your oven rack to ensure even baking.
- Want to Flavor It? A touch of vanilla, lemon zest, or matcha powder can be stirred into the batter for variety.
Frequently Asked Questions
- Why did my cupcakes collapse after baking? They may have been underbaked or cooled too quickly. Let them sit in the oven with the door ajar after baking.
- Can I use a different type of flour? Cake flour gives the best texture, but all-purpose flour can be used in a pinch. Just expect a slightly denser crumb.
- Do I really need a water bath? Yes! It helps regulate temperature and adds moisture, which is crucial for the delicate texture.
- How do I know when they're done baking? The tops should be lightly golden and spring back when touched. A skewer should come out mostly clean.
- Can I make these ahead of time? Absolutely. These cupcakes taste even better after a night in the fridge, and they hold up well for several days.
- What can I use instead of cream of tartar? A few drops of lemon juice or vinegar will help stabilize your egg whites in place of cream of tartar.
- Can I double the recipe? Yes, but be sure not to overcrowd the oven. Bake in batches if needed.
Final Thoughts
Fluffy Japanese cotton cheesecake cupcakes are the ultimate treat for when you want something elegant, light, and just sweet enough. They're beautiful to look at and even more delightful to eat. With their cloudlike texture and charming presentation, they’re perfect for baby showers, birthdays, or a quiet night in with a good book.
Have you tried making these? What’s your favorite way to top or fill them? I'd love to hear your twist on this dreamy dessert!
Japanese Cotton Cheesecake Cupcakes
Ingredients
- 200 g cream cheese softened
- 50 g unsalted butter
- 100 ml milk
- 4 large eggs separated
- 60 g granulated sugar
- 50 g cake flour
- 10 g cornstarch
- ¼ teaspoon cream of tartar
- Powdered sugar for dusting
- Whipped cream for filling (optional)
Instructions
Step 1: Preheat and Prepare
- Preheat your oven to 300°F (150°C). Line a muffin pan with 10 paper cupcake liners. For extra lift and even baking, use high-quality liners and a sturdy muffin pan.
Step 2: Melt the Cream Cheese Mixture
- In a heatproof bowl set over a pot of simmering water (double boiler method), melt the cream cheese, butter, and milk. Stir constantly until the mixture is smooth and silky. Remove from heat and let cool for a few minutes before adding dry ingredients.
Step 3: Mix in the Dry Ingredients
- Sift the cake flour and cornstarch together to eliminate any lumps. Gently whisk into the cream cheese mixture until fully incorporated and smooth.
Step 4: Add Egg Yolks
- Add the egg yolks one at a time, whisking until the mixture is creamy and uniform. This step helps create the rich yet light structure of the cupcakes.
Step 5: Beat the Egg Whites
- In a clean, grease-free bowl, beat the egg whites and cream of tartar until foamy. Gradually add the sugar and continue to beat until stiff peaks form. The whites should be glossy and hold their shape.
Step 6: Fold in the Egg Whites
- Carefully fold the meringue into the cream cheese mixture in three additions. Use a gentle, sweeping motion to avoid deflating the batter. The goal is to keep the mixture airy and light.
Step 7: Fill and Prepare the Water Bath
- Spoon the batter into the prepared cupcake liners, filling each about ¾ full. Place the muffin pan inside a larger baking dish. Fill the outer dish with hot water about halfway up the sides of the muffin pan. This gentle steam helps prevent cracking and creates that cottony texture.
Step 8: Bake to Perfection
- Bake for 25–30 minutes or until the tops are a light golden color and the centers are set. Avoid opening the oven door too often to maintain the temperature. When done, turn off the oven and let the cupcakes sit inside for 5 more minutes with the door ajar.
Step 9: Cool and Finish
- Let the cupcakes cool completely on a wire rack. Once cooled, you can pipe whipped cream into the center for a creamy surprise. Finish with a light dusting of powdered sugar for that classic, elegant look.
Notes
- Room Temperature Ingredients: Make sure your cream cheese, eggs, and butter are at room temp for a smoother batter.
- Gentle Folding is Key: Take your time folding the meringue—rushing can deflate the air and compromise texture.
- Water Bath Must: Skipping it can lead to dry or cracked cupcakes. Use boiling water for best results.
- Pan Placement: Center your oven rack to ensure even baking.
- Want to Flavor It? A touch of vanilla, lemon zest, or matcha powder can be stirred into the batter for variety.

