As a mom and grandma, I have quite a few recipes that have stood the test of time, but this Classic Cherry Delight is one that holds a particularly special place in my heart. It’s one of those desserts that’s so simple yet incredibly delicious, making it a staple at every family gathering, holiday celebration, and sometimes just because. I remember the first time I made it for my kids when they were young, and their faces lit up with pure delight at the sweet, creamy layers topped with that beautiful, glossy cherry pie filling. Now, they make it for their own kids, which makes this recipe even more special.
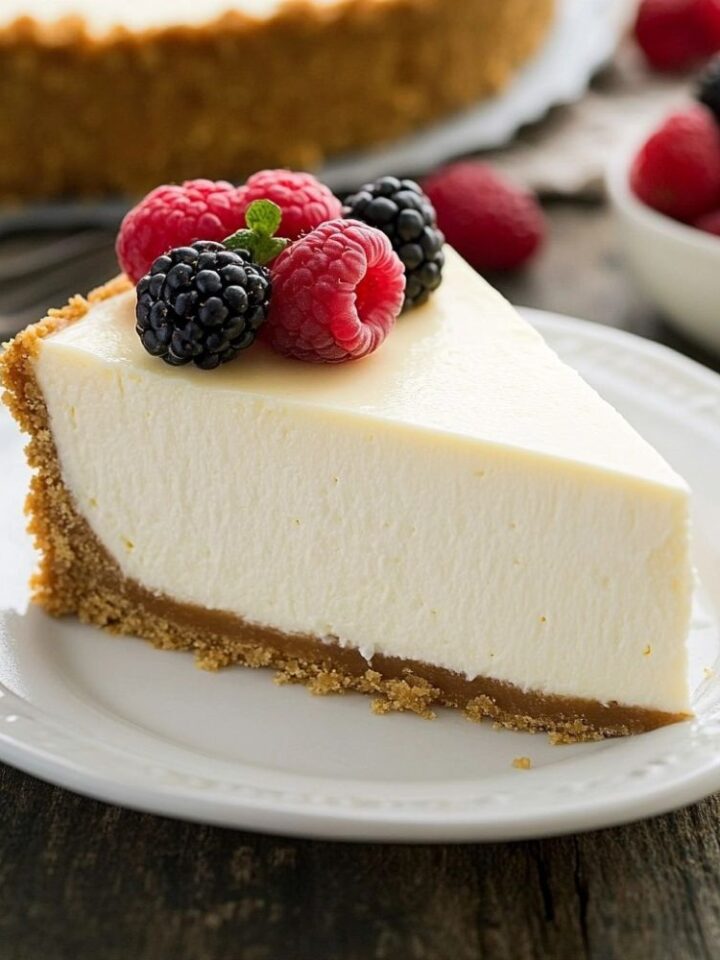
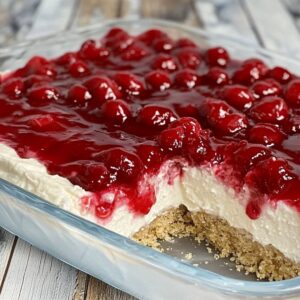
This dessert is a perfect blend of crunchy graham cracker crust, fluffy cream cheese filling, and a slightly tart cherry topping. It’s light yet rich, and just the right amount of sweetness. Plus, it requires no baking, making it one of the easiest, most fuss-free desserts you can make. Let me share how I make this cherished dessert with a few personal tips I’ve learned along the way.
Why I Love This Recipe
One of the best parts about Classic Cherry Delight is how incredibly simple it is to prepare. As a mom who was always busy raising kids and now a grandma who enjoys spending time with my grandkids, I appreciate recipes that don’t require hours in the kitchen. This recipe is quick, easy, and has minimal ingredients. Plus, it’s one of those desserts that everyone loves. I’ve never met anyone who didn’t go back for seconds!
Here’s why this recipe has been a family favorite for so many years:
- No-Bake Delight: There’s no need to turn on the oven, which makes it perfect for hot summer days.
- Creamy and Dreamy: The combination of cream cheese and whipped cream creates a light, fluffy layer that pairs beautifully with the cherry topping.
- Sweet and Tart: The sweet filling and the tart cherries balance each other perfectly, creating a satisfying dessert that isn’t overly rich.
Recipe: Classic Cherry Delight
Ingredients
For the Crust:
- 2 cups graham cracker crumbs
- ½ cup unsalted butter, melted
- ¼ cup granulated sugar
For the Cream Cheese Filling:
- 8 oz cream cheese, softened
- 1 cup powdered sugar
- 1 teaspoon vanilla extract
- 1 ½ cups heavy whipping cream, cold
For the Topping:
- 1 (21 oz) can cherry pie filling
Step-by-Step Instructions
Step 1: Make the Graham Cracker Crust
To start, I combine the graham cracker crumbs, melted butter, and granulated sugar in a mixing bowl. Stir until the crumbs are well-coated, creating a texture that holds together when pressed. Then, I press the mixture evenly into the bottom of a 9x13-inch dish. Pressing firmly is key here, as it ensures the crust doesn’t crumble when sliced. Once the crust is ready, I pop it into the fridge to set while I prepare the filling.
Step 2: Prepare the Cream Cheese Filling
For the creamy layer, I start by beating the softened cream cheese until smooth. I remember the first time I made this dessert, I hadn’t softened the cream cheese enough, and I ended up with lumps in the filling! So now, I make sure to let it sit at room temperature for a good 30 minutes before using. After beating the cream cheese, I add the powdered sugar and vanilla extract, mixing until well combined.
Next comes the whipped cream. I pour the cold heavy whipping cream into a separate bowl and beat it until soft peaks form. Then, I gently fold the whipped cream into the cream cheese mixture. Folding instead of mixing helps keep the filling light and fluffy, which is exactly what makes this dessert so delightful.
Step 3: Assemble the Layers
Once the filling is ready, I spread it evenly over the graham cracker crust. Sometimes, I’ll let my grandkids help with this step, as they love using the spatula to smooth it out. It’s these little moments that make cooking with family so special.
After the filling is spread, it’s time for the crowning glory—the cherry pie filling. I spoon the cherry pie filling over the cream cheese layer, spreading it carefully to create an even layer of beautiful, shiny cherries. There’s something so satisfying about seeing the bright red cherries against the creamy layer beneath.
Step 4: Chill and Serve
Now comes the hardest part: waiting. I cover the dish and refrigerate it for at least 2 hours, though overnight is even better. The longer it chills, the more the layers set, making it easier to slice and serve.

Tips for Making the Perfect Cherry Delight
After making this recipe countless times, I’ve picked up a few tips that ensure it turns out perfectly every time:
- Softening Cream Cheese: Make sure the cream cheese is fully softened before mixing. This helps prevent any lumps in the filling, which keeps it smooth and creamy.
- Cold Whipping Cream: Using cold heavy cream makes a big difference in how well it whips up. If possible, chill the bowl and beaters as well.
- Layering the Cherries: For a beautiful presentation, spoon the cherry pie filling over the top and spread gently to avoid mixing it into the creamy layer.
- Let it Chill: This dessert needs a good chill time, so plan to make it a few hours ahead. Chilling helps the flavors meld and makes it easier to cut into neat slices.
Why This Recipe is a Family Tradition
One of the best things about Classic Cherry Delight is how it brings my family together. Over the years, this dessert has been a fixture at so many gatherings. Whether it’s for birthdays, holidays, or simply a Sunday family dinner, everyone lights up when they see it on the table.
Making this dessert with my grandkids now brings back memories of making it with my own kids. They love helping with the crust and spreading the layers. It’s a simple recipe that allows them to participate and learn a little bit about baking, even if there’s no actual baking involved. It’s these little traditions, these shared moments in the kitchen, that make this dessert so much more than just a recipe.
Frequently Asked Questions (FAQs)
Q1: Can I make this dessert ahead of time?
Absolutely! This dessert actually gets better the longer it sits. Making it the day before and letting it chill overnight allows the flavors to meld beautifully.
Q2: Can I use other pie fillings?
Yes, this recipe is versatile! Blueberry, strawberry, and even apple pie fillings make great alternatives if you’re looking to switch things up.
Q3: How should I store leftovers?
Store any leftovers covered in the refrigerator for up to 3 days. It tastes just as delicious, if not better, the next day.
Q4: Can I use store-bought whipped topping instead of making whipped cream?
Yes, you can substitute with an 8-ounce tub of whipped topping, though I find that homemade whipped cream gives it a richer, fresher flavor.
Q5: What’s the best way to slice this dessert?
Use a sharp knife, and wipe it clean between cuts for neat slices.
Final Thoughts
This Classic Cherry Delight is more than just a dessert for me. It’s a tradition, a treat, and a way to bring smiles to my family’s faces. It’s a recipe I’ve made countless times and one that I know my children and grandchildren will continue to make. For me, that’s what cooking is all about—creating something special that brings people together.
So if you’re looking for an easy, delicious dessert to share with your loved ones, I hope you’ll give this recipe a try. It’s a family favorite in my home, and I hope it becomes one in yours too.
Classic Cherry Delight
Ingredients
For the Crust:
- 2 cups graham cracker crumbs
- ½ cup unsalted butter melted
- ¼ cup granulated sugar
For the Cream Cheese Filling:
- 8 oz cream cheese softened
- 1 cup powdered sugar
- 1 teaspoon vanilla extract
- 1 ½ cups heavy whipping cream cold
For the Topping:
- 1 21 oz can cherry pie filling
Instructions
Step 1: Make the Graham Cracker Crust
- To start, I combine the graham cracker crumbs, melted butter, and granulated sugar in a mixing bowl. Stir until the crumbs are well-coated, creating a texture that holds together when pressed. Then, I press the mixture evenly into the bottom of a 9x13-inch dish. Pressing firmly is key here, as it ensures the crust doesn’t crumble when sliced. Once the crust is ready, I pop it into the fridge to set while I prepare the filling.
Step 2: Prepare the Cream Cheese Filling
- For the creamy layer, I start by beating the softened cream cheese until smooth. I remember the first time I made this dessert, I hadn’t softened the cream cheese enough, and I ended up with lumps in the filling! So now, I make sure to let it sit at room temperature for a good 30 minutes before using. After beating the cream cheese, I add the powdered sugar and vanilla extract, mixing until well combined.
- Next comes the whipped cream. I pour the cold heavy whipping cream into a separate bowl and beat it until soft peaks form. Then, I gently fold the whipped cream into the cream cheese mixture. Folding instead of mixing helps keep the filling light and fluffy, which is exactly what makes this dessert so delightful.
Step 3: Assemble the Layers
- Once the filling is ready, I spread it evenly over the graham cracker crust. Sometimes, I’ll let my grandkids help with this step, as they love using the spatula to smooth it out. It’s these little moments that make cooking with family so special.
- After the filling is spread, it’s time for the crowning glory—the cherry pie filling. I spoon the cherry pie filling over the cream cheese layer, spreading it carefully to create an even layer of beautiful, shiny cherries. There’s something so satisfying about seeing the bright red cherries against the creamy layer beneath.
Step 4: Chill and Serve
- Now comes the hardest part: waiting. I cover the dish and refrigerate it for at least 2 hours, though overnight is even better. The longer it chills, the more the layers set, making it easier to slice and serve.
Notes
- Softening Cream Cheese: Make sure the cream cheese is fully softened before mixing. This helps prevent any lumps in the filling, which keeps it smooth and creamy.
- Cold Whipping Cream: Using cold heavy cream makes a big difference in how well it whips up. If possible, chill the bowl and beaters as well.
- Layering the Cherries: For a beautiful presentation, spoon the cherry pie filling over the top and spread gently to avoid mixing it into the creamy layer.
- Let it Chill: This dessert needs a good chill time, so plan to make it a few hours ahead. Chilling helps the flavors meld and makes it easier to cut into neat slices.


