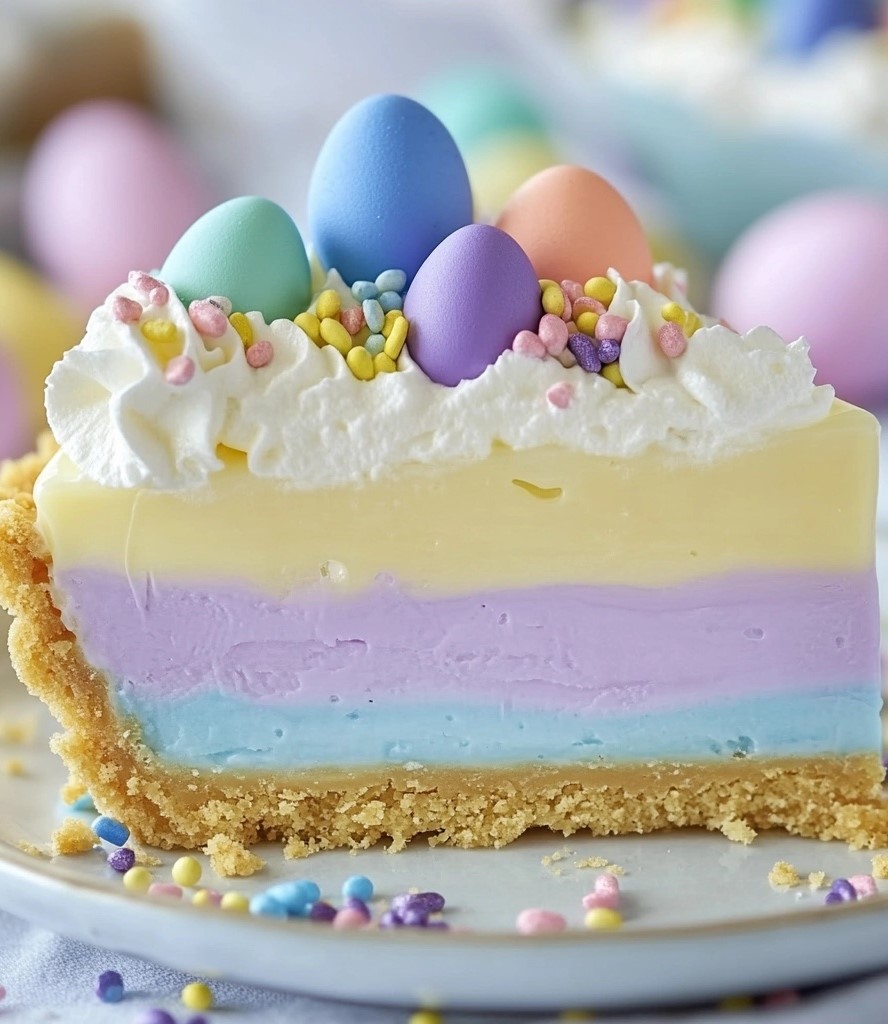
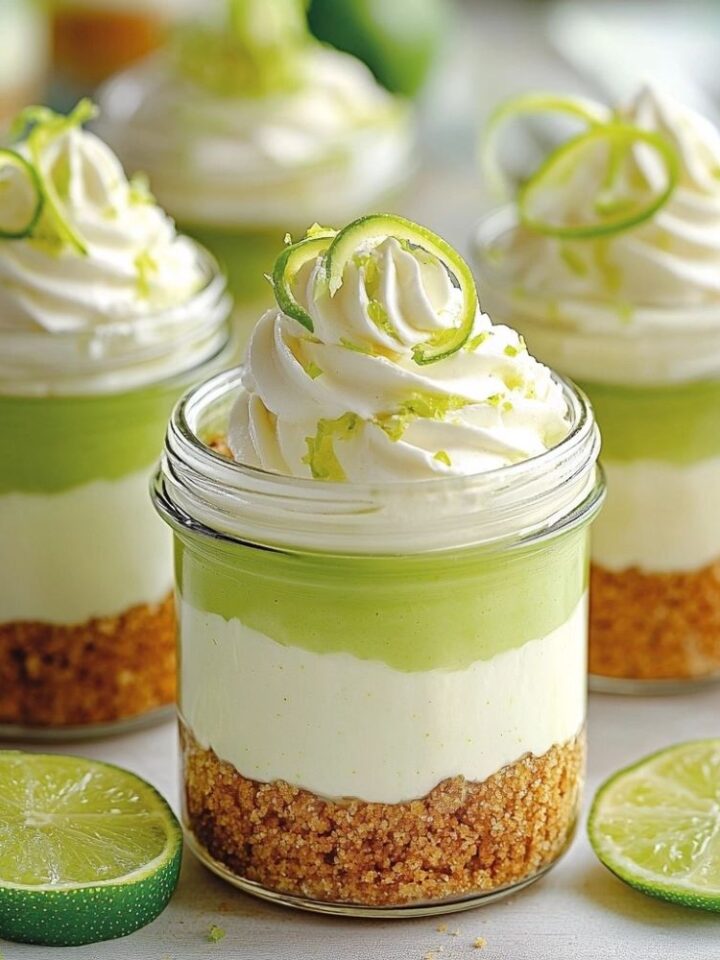
There’s something magical about Easter desserts—light, colorful, and just sweet enough to bring joy to every bite. This Easter Jell-O Pie is a nostalgic, fun, and easy-to-make treat that’s perfect for the season. I remember my grandmother making a version of this every year, carefully layering the pastel-colored Jell-O into a buttery graham cracker crust. As a kid, I was always mesmerized by the way the colors set so perfectly. Now, making it myself, I love how it brings the same excitement to my own family gatherings!
If you’re looking for a no-bake dessert that’s as beautiful as it is delicious, this Jell-O pie is the perfect addition to your Easter table. Let’s dive in!
Why You’ll Love This Recipe
Bright & Festive: The soft pastel layers make this pie the ultimate Easter centerpiece.
🕒 Easy & No-Bake: No oven required—just mix, chill, and enjoy!
Customizable: Swap out Jell-O flavors for different colors and tastes.
💡 Kid-Friendly Fun: A great recipe for little helpers who love mixing and layering.
🎉 Perfect for Spring Gatherings: Light, refreshing, and sure to impress your guests.
Ingredients You’ll Need
For the Crust:
- 2 cups graham cracker crumbs
- ½ cup unsalted butter, melted
- ¼ cup granulated sugar
For the Jell-O Layers:
- 1 box (3 oz) lemon Jell-O 🍋
- 1 box (3 oz) blue raspberry Jell-O 💙
- 1 box (3 oz) grape Jell-O 🍇
- 3 cups boiling water (divided)
- 3 cups cold water (divided)
- 1 cup whipped topping (divided)
For Garnishing:
- Whipped cream swirls 🍦
- Candy eggs 🥚
- Pastel sprinkles 🎊
👉 Substitutions: You can swap the graham cracker crust for an Oreo or shortbread crust for a fun twist! Also, feel free to use homemade whipped cream instead of store-bought topping.
Step-by-Step Instructions
1. Prepare the Crust
- In a mixing bowl, combine graham cracker crumbs, melted butter, and sugar until the mixture resembles wet sand.
- Press firmly into a 9-inch pie dish, making sure the crust is even.
- Refrigerate for at least 15 minutes while preparing the filling.
💡 Tip: Pressing the crust firmly ensures it holds together when slicing the pie. Use the bottom of a glass to help smooth it out!
2. Make the Jell-O Layers
Lemon Layer (Bottom Layer):
- In a bowl, dissolve lemon Jell-O in 1 cup of boiling water and stir for about 2 minutes until completely dissolved.
- Add 1 cup of cold water and stir.
- Gently fold in ⅓ cup of whipped topping, mixing until smooth.
- Pour into the crust and refrigerate for 30 minutes until slightly firm.
Blue Raspberry Layer (Middle Layer):
- Repeat the same process with blue raspberry Jell-O and another ⅓ cup of whipped topping.
- Pour gently over the lemon layer and refrigerate for 30 minutes.
Grape Layer (Top Layer):
- Repeat with grape Jell-O, folding in the last portion of whipped topping.
- Pour over the blue raspberry layer and refrigerate for at least 4 hours, or until fully set.
💡 Tip: Pour each layer slowly over the back of a spoon to prevent mixing colors and to keep the layers crisp and separate.
3. Decorate & Serve
- Once the pie is fully set, pipe whipped cream swirls around the edges.
- Add candy eggs for a festive Easter touch.
- Sprinkle with pastel sprinkles to complete the look.
💡 Tip: For the best presentation, slice with a sharp knife dipped in warm water and wipe the blade clean between cuts.
Serving & Storage Tips
🥶 Storage: Keep the pie refrigerated for up to 3 days. Cover loosely with plastic wrap to maintain freshness.
🧊 Freezing: You can freeze the pie (without whipped topping) for up to 1 month. Thaw in the refrigerator before serving.
🔥 Reheating? Nope! This pie is best served cold, straight from the fridge.
🍽 Serving Idea: Pair with a cup of lemon tea or a fruity cocktail for a refreshing Easter treat.
Helpful Notes
✅ Don’t rush the layers: Each layer needs time to set, or they’ll blend together. Be patient!
✅ Want it creamier? Add a little extra whipped topping to each layer for an ultra-light texture.
✅ Make it sugar-free: Use sugar-free Jell-O and swap sugar with a low-carb alternative.
✅ Experiment with colors: Try strawberry, lime, or orange Jell-O for different pastel combinations!
Frequently Asked Questions (FAQ)
1. Can I make this pie ahead of time?
Yes! This pie is actually better when made a day in advance, as it allows the layers to fully set.
2. Can I use a store-bought crust?
Absolutely! A pre-made graham cracker or shortbread crust works perfectly if you want to save time.
3. Why are my Jell-O layers mixing together?
This happens if the bottom layers aren’t set enough before adding the next one. Make sure to chill for at least 30 minutes before adding a new layer.
4. Can I use homemade whipped cream?
Yes! Just whip heavy cream with a little powdered sugar and vanilla for a homemade alternative.
5. How do I get clean slices?
Use a sharp knife dipped in warm water, and wipe it clean after each cut. This prevents layers from smudging together.
Final Thoughts
This Easter Jell-O Pie is a show-stopping, no-bake dessert that’s perfect for spring celebrations. The layers of lemon, blue raspberry, and grape Jell-O create a beautiful pastel effect, while the graham cracker crust adds the perfect crunch. Whether you’re serving it at an Easter brunch or just making it for fun, it’s sure to bring smiles all around!
🌸 What’s your favorite Jell-O flavor combination for this pie? Let me know in the comments! 🥧💬

