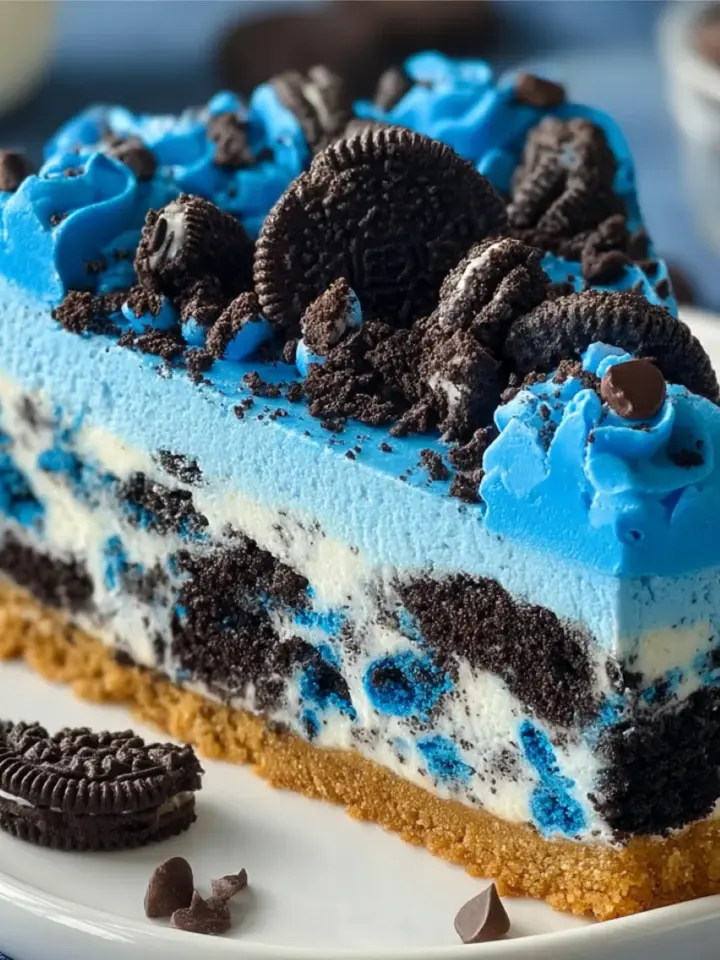
Some desserts bring instant joy, and this Funfetti Oreo Icebox Cake is one of them. I first made this cake for a friend’s birthday party, and it was an instant hit—vanishing within minutes! It’s a nostalgic mix of birthday cake flavors, cookies, and cream, all wrapped up in a delightful, no-bake treat. If you love Oreos, funfetti sprinkles, and creamy layers, this is the dessert for you.

Icebox cakes have been a classic dessert for decades, and this version adds a colorful, fun twist. The concept is simple: cookies layered with a creamy filling that softens in the fridge, turning into a cake-like texture. With just a handful of ingredients and no need for baking, this recipe is ideal for both beginners and seasoned bakers looking for a stress-free yet impressive treat.
Why You’ll Love This Recipe
- No-Bake & Easy – Perfect for hot days when you don’t want to turn on the oven.
- Kid-Friendly & Fun – Sprinkles make everything better, and kids love helping assemble the layers.
- Great for Parties – A colorful, crowd-pleasing dessert that’s easy to make ahead of time.
- Rich & Creamy – The combination of whipped cream, cream cheese, and sweetened condensed milk creates an indulgent texture.
- Customizable – Swap out Oreos for other cookies or use different sprinkle colors for themed celebrations.
- Perfect Make-Ahead Dessert – Tastes even better the next day as the layers meld together!
Ingredients You’ll Need
- 2 cups heavy whipping cream – Creates a light, fluffy texture.
- ½ cup powdered sugar – Sweetens and stabilizes the whipped cream.
- 1 teaspoon vanilla extract – Enhances the overall flavor.
- 1 (8 oz) block cream cheese, softened – Adds a creamy richness.
- 1 (14 oz) can sweetened condensed milk – Sweetens and smooths out the filling.
- 1 ½ cups rainbow sprinkles – Adds fun and color.
- 30 Oreo cookies, crushed – The base of this dessert.
- 1 cup milk (for dipping cookies) – Softens the cookies for layering.
Step-by-Step Instructions
1. Whip the Cream
In a large bowl, beat the heavy whipping cream, powdered sugar, and vanilla extract until stiff peaks form. This ensures a light and airy texture. Set aside.
2. Prepare the Cream Mixture
In another bowl, beat the softened cream cheese until smooth. Add the sweetened condensed milk and mix until fully combined. This will be the rich and creamy base of your cake.
3. Fold in Whipped Cream and Sprinkles
Gently fold the whipped cream mixture into the cream cheese mixture to maintain its fluffiness. Stir in 1 cup of rainbow sprinkles for a festive touch. Be careful not to overmix, as you want to keep as much air in the mixture as possible.
4. Layer the Oreos
Dip each Oreo cookie into milk for about a second—just enough to soften but not make them soggy. Place a layer of Oreos in a 9x9-inch dish. This step helps the cookies absorb moisture, creating that soft, cake-like texture once chilled.
5. Assemble the Layers
Spread a generous layer of the cream mixture over the Oreos. Repeat the layering process until all ingredients are used, finishing with a thick layer of cream on top. Aim for at least three layers for the best texture and flavor.
6. Add the Finishing Touch
Sprinkle the remaining rainbow sprinkles on top for extra color and crunch. Cover the dish and refrigerate for at least 4 hours or, ideally, overnight for the best flavor and texture. The longer it chills, the better the flavors will meld together.
Serving and Storage Tips
- Serving: Slice and serve chilled for the best texture. Add extra crushed Oreos or whipped cream on top for a fancy finish.
- Storage: Keep refrigerated for up to 3 days in an airtight container.
- Freezing: You can freeze this icebox cake for up to a month. Let it thaw in the fridge for a few hours before serving.
- Reheating: No reheating is needed—just slice and enjoy!
- Serving Suggestions: Pair this cake with fresh berries, a drizzle of chocolate syrup, or even a scoop of vanilla ice cream for an extra indulgent experience.
Helpful Notes
- For extra crunch, add crushed Oreos between layers instead of dipping them in milk.
- Chilling overnight enhances the flavors and softens the cookies perfectly.
- Try different cookies like graham crackers, Biscoff, or Golden Oreos for a unique twist.
- If you don’t have sprinkles, mix in mini chocolate chips or chopped nuts.
- Make it a holiday treat by using themed sprinkles for Christmas, Halloween, or birthdays!
Frequently Asked Questions (FAQ)
- Can I use Cool Whip instead of homemade whipped cream?
Yes! Substitute 3 cups of Cool Whip for the homemade whipped cream. - Can I make this cake ahead of time?
Absolutely! It’s best when made a day ahead so the layers set perfectly. - Why did my cream mixture turn out runny?
Make sure to whip the heavy cream to stiff peaks and fold it gently into the mixture. - What’s the best way to cut this cake neatly?
Use a sharp knife and wipe it clean between slices for neat layers. - Can I make this recipe gluten-free?
Yes! Use gluten-free Oreos and ensure your sprinkles are gluten-free. - Can I add fruit to this recipe?
Absolutely! Fresh strawberries, raspberries, or banana slices can be added between layers for a fruity twist. - How do I prevent my sprinkles from bleeding into the mixture?
Use jimmies (the long, rod-shaped sprinkles) instead of nonpareils, as they tend to hold their shape better.
Final Thoughts
This Funfetti Oreo Icebox Cake is a guaranteed hit for any occasion—whether it's a birthday party, potluck, or just a fun weekend treat. It’s colorful, creamy, and packed with nostalgic flavors that everyone will love. Serve it alongside a glass of milk or a scoop of vanilla ice cream for an extra indulgent experience.
If you’re a fan of easy no-bake desserts, this will quickly become a go-to favorite. The combination of funfetti sprinkles, Oreos, and a rich, creamy filling makes every bite irresistible. Plus, it’s endlessly adaptable—change up the cookies, add mix-ins, or swap the sprinkles to match any celebration!

Funfetti Oreo Icebox Cake
Ingredients
- 2 cups heavy whipping cream
- ½ cup powdered sugar
- 1 teaspoon vanilla extract
- 1 8 oz block cream cheese, softened
- 1 14 oz can sweetened condensed milk
- 1 ½ cups rainbow sprinkles
- 30 Oreo cookies crushed
- 1 cup milk for dipping cookies
Instructions
Whip the Cream
- In a large bowl, beat the heavy whipping cream, powdered sugar, and vanilla extract until stiff peaks form. This ensures a light and airy texture. Set aside.
Prepare the Cream Mixture
- In another bowl, beat the softened cream cheese until smooth. Add the sweetened condensed milk and mix until fully combined. This will be the rich and creamy base of your cake.
Fold in Whipped Cream and Sprinkles
- Gently fold the whipped cream mixture into the cream cheese mixture to maintain its fluffiness. Stir in 1 cup of rainbow sprinkles for a festive touch. Be careful not to overmix, as you want to keep as much air in the mixture as possible.
Layer the Oreos
- Dip each Oreo cookie into milk for about a second—just enough to soften but not make them soggy. Place a layer of Oreos in a 9×9-inch dish. This step helps the cookies absorb moisture, creating that soft, cake-like texture once chilled.
Assemble the Layers
- Spread a generous layer of the cream mixture over the Oreos. Repeat the layering process until all ingredients are used, finishing with a thick layer of cream on top. Aim for at least three layers for the best texture and flavor.
Add the Finishing Touch
- Sprinkle the remaining rainbow sprinkles on top for extra color and crunch. Cover the dish and refrigerate for at least 4 hours or, ideally, overnight for the best flavor and texture. The longer it chills, the better the flavors will meld together.
Notes
- For extra crunch, add crushed Oreos between layers instead of dipping them in milk.
- Chilling overnight enhances the flavors and softens the cookies perfectly.
- Try different cookies like graham crackers, Biscoff, or Golden Oreos for a unique twist.
- If you don’t have sprinkles, mix in mini chocolate chips or chopped nuts.
- Make it a holiday treat by using themed sprinkles for Christmas, Halloween, or birthdays!