Making divinity candy always takes me back to my grandmother’s kitchen during the holidays. I’d sit on the counter, watching her whip up this fluffy, melt-in-your-mouth treat while she hummed carols. It felt like magic when the glossy syrup transformed into clouds of sweetness. Now, it’s my turn to carry on this tradition, and I can’t wait to share this easy and foolproof recipe with you!

Why You’ll Like It
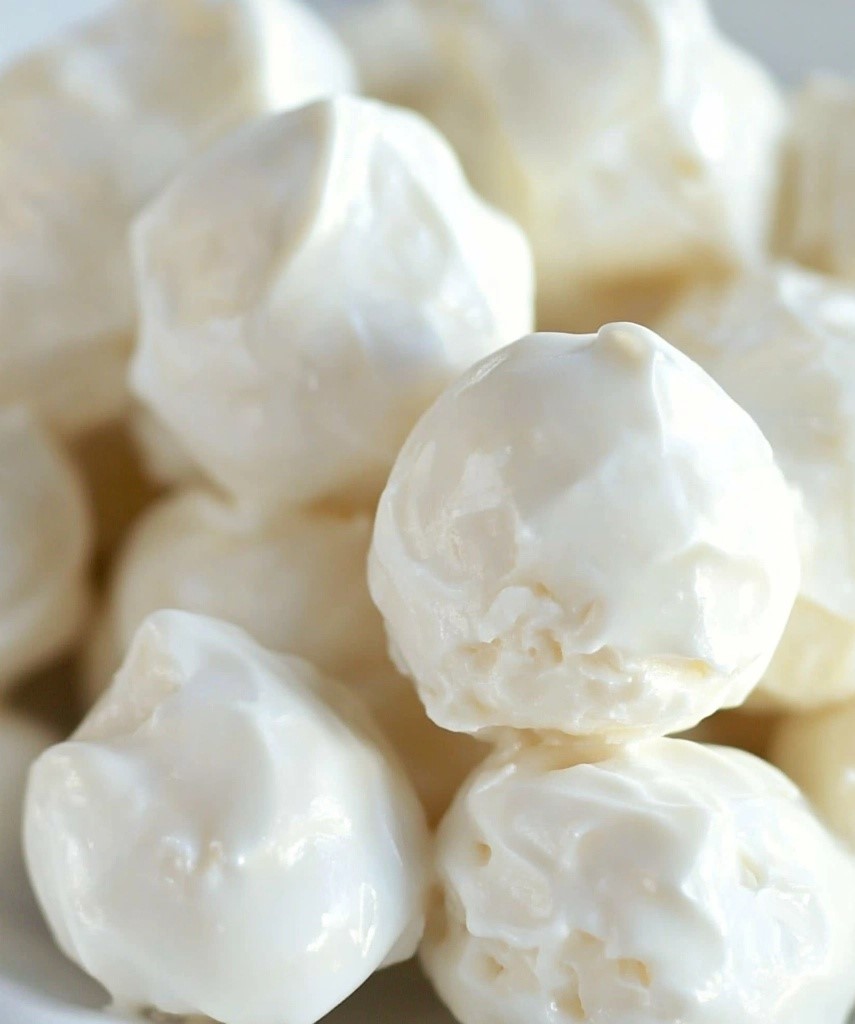
This divinity candy is a timeless classic that’s perfect for holidays or special occasions. Its light, airy texture pairs beautifully with the crunch of nuts, making every bite a delightful experience. Plus, it’s easier than you think and a great way to impress guests or share a heartfelt homemade gift.
The Recipe: Easy Divinity Candy
Ingredients
- 2 ½ cups granulated sugar
- ½ cup light corn syrup
- ½ cup water
- 2 large egg whites
- 1 teaspoon vanilla extract
- ½ cup chopped pecans or walnuts (optional)
Step-by-Step Instructions
- Prepare Your Workstation
Line a baking sheet with parchment paper or wax paper. If using nuts, chop them finely and set them aside. - Make the Syrup
In a heavy saucepan, combine the sugar, corn syrup, and water. Cook over medium heat, stirring constantly until the sugar dissolves.- Attach a candy thermometer and cook without stirring until the mixture reaches 250°F (hard ball stage).
- Beat the Egg Whites
While the syrup is cooking, beat the egg whites in a large, clean mixing bowl until stiff peaks form. - Combine Syrup and Egg Whites
- Once the syrup reaches 250°F, slowly pour it in a thin stream into the beaten egg whites while continuously mixing at medium speed.
- Be cautious and pour carefully to avoid splattering hot syrup.
- Add Flavoring and Nuts
- Increase the mixer speed to high and continue beating until the candy loses its glossy shine and holds its shape, about 4-5 minutes.
- Mix in the vanilla extract and nuts (if using) until just combined.
- Shape the Divinity
Using two spoons, drop spoonfuls of the mixture onto the prepared baking sheet. Work quickly as the candy will set fast. - Cool and Store
Allow the candies to cool completely at room temperature before transferring them to an airtight container.
Serving and Storage Tips
- Serving: Divinity candy is best enjoyed fresh, but it can be served at room temperature alongside other holiday treats. Pair it with tea or coffee for a delightful snack.
- Storage: Store in an airtight container at room temperature for up to two weeks. Avoid refrigerating as humidity can affect its texture. If layering, separate pieces with parchment paper to prevent sticking.
Helpful Notes
- Humidity Warning: Avoid making divinity candy on a humid day. Moisture in the air can prevent it from setting properly.
- Be Quick: Once the mixture starts to lose its gloss, work quickly to shape the candy before it hardens.
- Nut Substitutes: If you’re not a fan of nuts, you can leave them out or substitute with candied cherries for a festive twist.
FAQs
- Can I use dark corn syrup instead of light corn syrup?
While dark corn syrup can be used, it will alter the color and flavor of the candy, making it less traditional. Light corn syrup is recommended for the classic taste and appearance. - Why isn’t my divinity setting properly?
This often happens due to high humidity or undercooking the syrup. Ensure the syrup reaches exactly 250°F and avoid making divinity on damp days. - How do I know when the candy is ready to shape?
The mixture will lose its glossy shine and hold its shape when dropped from a spoon. This is the perfect time to start forming the candies. - Can I double the recipe?
It’s best to make divinity in smaller batches to ensure the syrup doesn’t cool too quickly. If you need more, prepare multiple separate batches. - Can I color the divinity?
Yes, you can add a few drops of food coloring while beating the mixture to give your candies a festive hue.
Final Thoughts
There’s something truly magical about making divinity candy—it’s a tradition steeped in love and nostalgia. Whether you’re preparing it for family, friends, or as a gift, this recipe is sure to create sweet memories. I hope it brings as much joy to your home as it does to mine. Happy cooking and enjoy the sweetness!

Easy Divinity Candy
Ingredients
- 2 ½ cups granulated sugar
- ½ cup light corn syrup
- ½ cup water
- 2 large egg whites
- 1 teaspoon vanilla extract
- ½ cup chopped pecans or walnuts optional
Instructions
Prepare Your Workstation
- Line a baking sheet with parchment paper or wax paper. If using nuts, chop them finely and set them aside.
Make the Syrup
- In a heavy saucepan, combine the sugar, corn syrup, and water. Cook over medium heat, stirring constantly until the sugar dissolves.
- Attach a candy thermometer and cook without stirring until the mixture reaches 250°F (hard ball stage).
Beat the Egg Whites
- While the syrup is cooking, beat the egg whites in a large, clean mixing bowl until stiff peaks form.
Combine Syrup and Egg Whites
- Once the syrup reaches 250°F, slowly pour it in a thin stream into the beaten egg whites while continuously mixing at medium speed.
- Be cautious and pour carefully to avoid splattering hot syrup.
Add Flavoring and Nuts
- Increase the mixer speed to high and continue beating until the candy loses its glossy shine and holds its shape, about 4-5 minutes.
- Mix in the vanilla extract and nuts (if using) until just combined.
Shape the Divinity
- Using two spoons, drop spoonfuls of the mixture onto the prepared baking sheet. Work quickly as the candy will set fast.
Cool and Store
- Allow the candies to cool completely at room temperature before transferring them to an airtight container.
Notes
- Humidity Warning: Avoid making divinity candy on a humid day. Moisture in the air can prevent it from setting properly.
- Be Quick: Once the mixture starts to lose its gloss, work quickly to shape the candy before it hardens.
- Nut Substitutes: If you’re not a fan of nuts, you can leave them out or substitute with candied cherries for a festive twist.