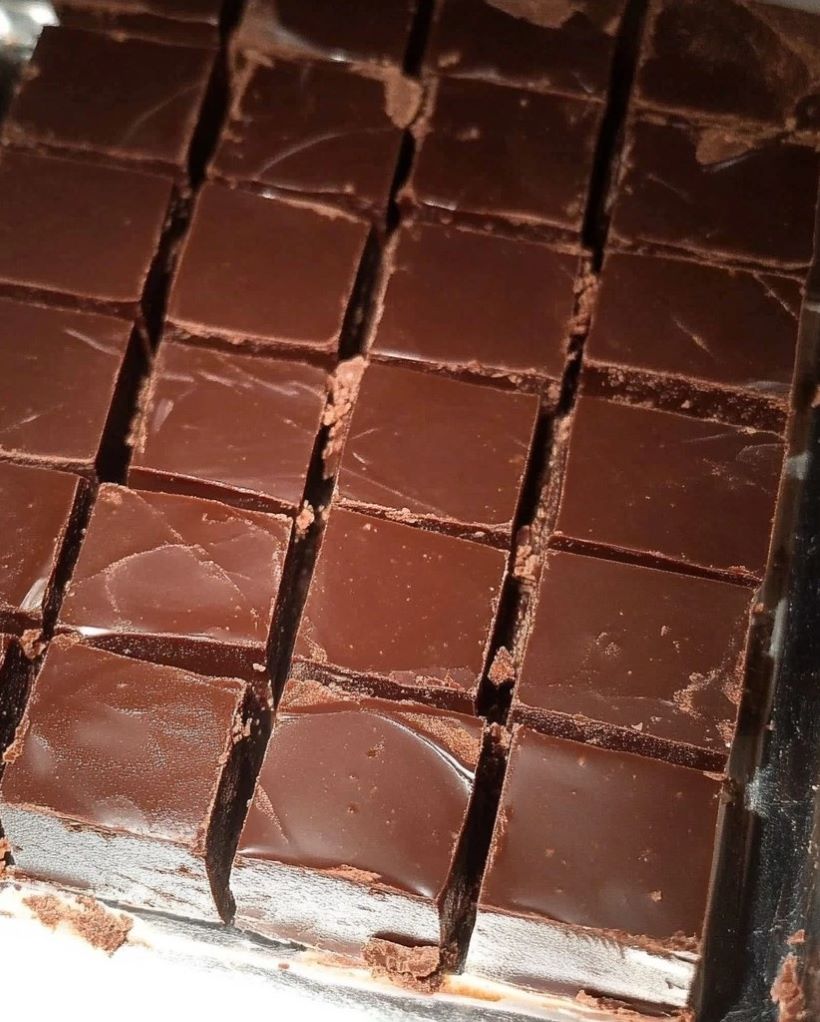
Growing up, there was one treat that always brought my family together: Old-Fashioned Hershey Cocoa Fudge. It wasn’t just about the deliciously rich, chocolatey squares that melted in your mouth—it was the process of making it. The recipe, passed down from my grandmother, was a labor of love, patience, and just a little bit of skill.
This fudge is nothing like the quick, microwave versions we often see today. It’s the kind of recipe that teaches you to slow down, pay attention, and savor every step. Let me take you through my personal journey with this recipe and why it holds such a special place in my heart.
My First Experience with Hershey Cocoa Fudge
The first time I helped make fudge, I was about eight years old. My grandmother was standing by the stove, stirring a bubbling pot of chocolate. The smell of cocoa filled the air, rich and intoxicating, while she patiently explained every step.
I was fascinated by her candy thermometer, watching as the numbers slowly climbed. When the mixture finally reached the "soft-ball stage," she poured it onto a buttered plate and let me help beat it until it transformed from glossy liquid to creamy fudge. It was magic.
That day, I learned that making fudge wasn’t just about the ingredients—it was about timing, technique, and a little bit of intuition. The reward? Perfectly smooth, melt-in-your-mouth squares of chocolate heaven.
Ingredients
Here’s the classic recipe we used, and it hasn’t changed much over the years:
- ⅔ cup Hershey’s cocoa powder
- 3 cups granulated sugar
- ⅛ teaspoon salt
- 1 ½ cups whole milk
- ¼ cup unsalted butter
- 1 teaspoon vanilla extract
Directions
Step 1: Prepare Your Pan
Start by buttering an 8x8-inch pan or lining it with parchment paper. This step ensures the fudge will release easily once it sets. My grandmother always insisted on buttering the pan by hand, saying it added an extra touch of love.
Step 2: Mix the Ingredients
In a heavy-bottomed saucepan, combine the cocoa powder, sugar, and salt. Whisk them together to break up any lumps. Slowly stir in the milk until the mixture is smooth. This is the foundation of the fudge, so take your time to get it right.
Step 3: Cook the Mixture
Place the saucepan over medium heat and stir constantly until the sugar dissolves. Bring the mixture to a boil, then reduce the heat slightly and attach a candy thermometer to the pan.
This is where patience comes in. Let the mixture cook without stirring until it reaches 234°F (soft-ball stage). It’s crucial not to stir during this stage, as it can cause the sugar to crystallize, leading to grainy fudge. I remember anxiously waiting for the thermometer to hit the mark, my grandmother reassuring me that good things take time.
Step 4: Add Butter and Vanilla
Once the mixture reaches 234°F, remove it from the heat and add the butter and vanilla extract. Do not stir yet—let the mixture cool to about 110°F. This cooling stage is key to achieving the perfect creamy texture.
Step 5: Beat the Fudge
Now comes the fun part. Using a wooden spoon, beat the fudge vigorously until it thickens and loses its glossy sheen. This step requires some elbow grease, but it’s worth it. My siblings and I would take turns stirring, laughing as our arms grew tired.
Step 6: Pour and Set
Quickly pour the fudge into the prepared pan, spreading it evenly with a spatula. Let it cool at room temperature until firm, about 2 hours.
Lessons Learned in the Kitchen
Making Hershey Cocoa Fudge isn’t just about following a recipe—it’s a lesson in patience and precision. Over the years, I’ve had my fair share of mishaps: fudge that didn’t set properly, grainy textures from over-stirring, or scorched cocoa from inattentiveness.
Each mistake taught me something valuable, not just about candy-making but about life. Good things often require effort, timing, and the ability to embrace imperfections.
Tips for Success
- Use a Candy Thermometer
A candy thermometer is your best friend for this recipe. The "soft-ball stage" (234°F) is critical for achieving the right texture. - Avoid Stirring While Boiling
Resist the urge to stir the mixture once it starts boiling. Stirring can cause sugar crystals to form, leading to a grainy fudge. - Butter the Pan Generously
Don’t skimp on buttering the pan—it makes cutting and serving the fudge much easier. - Work Quickly
Once the fudge thickens and loses its gloss, pour it into the pan immediately. It sets quickly, so be ready! - Store Properly
Store the fudge in an airtight container at room temperature for up to a week. For longer storage, keep it in the refrigerator.
Why I Keep Coming Back to This Recipe
In a world full of shortcuts, there’s something incredibly satisfying about making fudge the old-fashioned way. It’s a reminder to slow down and enjoy the process.
Every time I make this recipe, I’m transported back to my grandmother’s kitchen. The simple act of stirring the fudge connects me to her and to the traditions she passed down. It’s more than just a dessert—it’s a piece of my family’s history.
Final Thoughts
Old-Fashioned Hershey Cocoa Fudge isn’t just a recipe—it’s an experience. From the rich aroma of cocoa filling the kitchen to the satisfaction of cutting into perfect squares, every step is a labor of love.
Whether you’re making it for the first time or the hundredth, this fudge has a way of bringing people together. It’s a reminder of the simple joys in life: family, tradition, and the sweetness of homemade treats.
So this holiday season, roll up your sleeves, grab a wooden spoon, and make a batch of this timeless fudge. Trust me—it’s worth every minute.
Old-Fashioned Hershey Cocoa Fudge
Ingredients
- ⅔ cup Hershey’s cocoa powder
- 3 cups granulated sugar
- ⅛ teaspoon salt
- 1 ½ cups whole milk
- ¼ cup unsalted butter
- 1 teaspoon vanilla extract
Instructions
Step 1: Prepare Your Pan
- Start by buttering an 8x8-inch pan or lining it with parchment paper. This step ensures the fudge will release easily once it sets. My grandmother always insisted on buttering the pan by hand, saying it added an extra touch of love.
Step 2: Mix the Ingredients
- In a heavy-bottomed saucepan, combine the cocoa powder, sugar, and salt. Whisk them together to break up any lumps. Slowly stir in the milk until the mixture is smooth. This is the foundation of the fudge, so take your time to get it right.
Step 3: Cook the Mixture
- Place the saucepan over medium heat and stir constantly until the sugar dissolves. Bring the mixture to a boil, then reduce the heat slightly and attach a candy thermometer to the pan.
- This is where patience comes in. Let the mixture cook without stirring until it reaches 234°F (soft-ball stage). It’s crucial not to stir during this stage, as it can cause the sugar to crystallize, leading to grainy fudge. I remember anxiously waiting for the thermometer to hit the mark, my grandmother reassuring me that good things take time.
Step 4: Add Butter and Vanilla
- Once the mixture reaches 234°F, remove it from the heat and add the butter and vanilla extract. Do not stir yet—let the mixture cool to about 110°F. This cooling stage is key to achieving the perfect creamy texture.
Step 5: Beat the Fudge
- Now comes the fun part. Using a wooden spoon, beat the fudge vigorously until it thickens and loses its glossy sheen. This step requires some elbow grease, but it’s worth it. My siblings and I would take turns stirring, laughing as our arms grew tired.
Step 6: Pour and Set
- Quickly pour the fudge into the prepared pan, spreading it evenly with a spatula. Let it cool at room temperature until firm, about 2 hours.
Notes
- Work quickly during the beating stage as the fudge will harden fast.
- Store in an airtight container at room temperature for up to a week.

