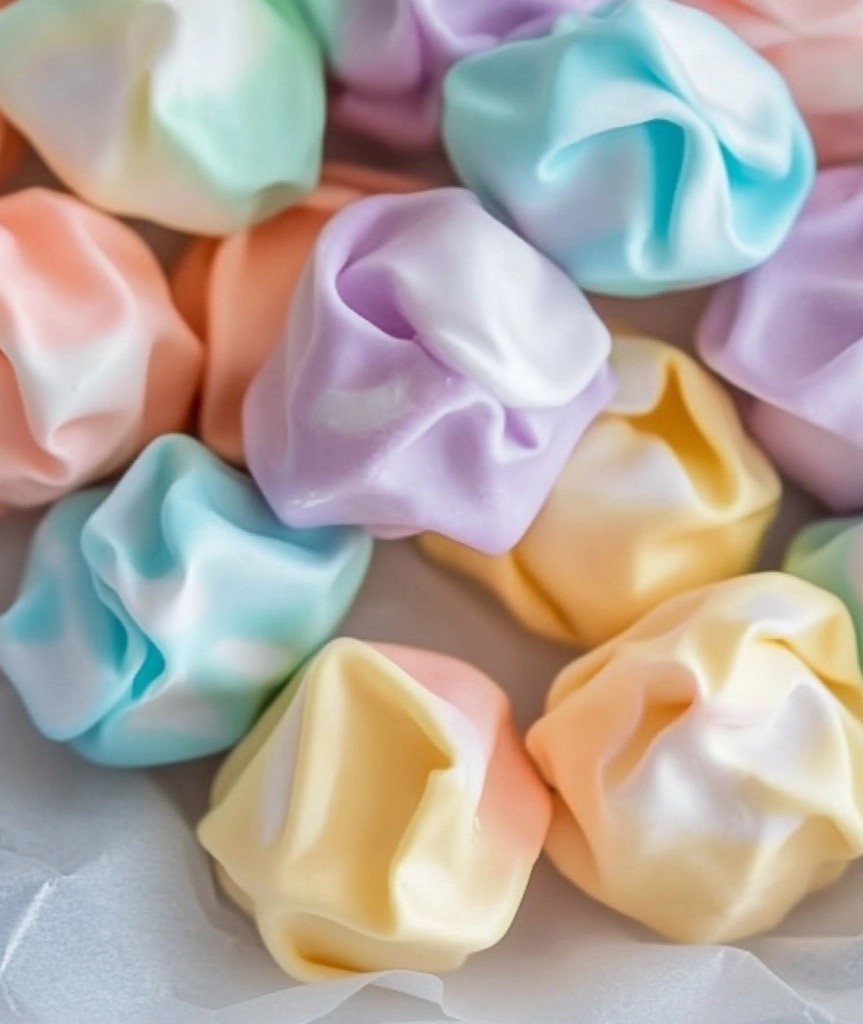
Nothing beats the soft, chewy, and nostalgic taste of homemade Saltwater Taffy! This old-fashioned candy is a fun and rewarding recipe that lets you create sweet, stretchy, and flavorful taffy right in your own kitchen. With a buttery texture, a hint of vanilla, and the option to add fun colors and flavors, this homemade treat is perfect for candy lovers of all ages.
Making saltwater taffy at home is not only delicious but also a fun hands-on experience—especially when you get to pull the taffy until it turns soft and aerated. Whether you’re making this for a special occasion, gift-giving, or just a fun family activity, you’re sure to enjoy every bite of this classic chewy candy.
Why You’ll Love This Recipe
✔️ Nostalgic & Classic – Enjoy the iconic boardwalk-style candy at home!
✔️ Customizable – Add different flavors and colors to make it unique.
✔️ Fun to Make – Pulling the taffy is a great hands-on activity for kids and adults alike.
✔️ Soft & Chewy – Perfectly stretchy and melt-in-your-mouth delicious!
✔️ Great for Gifts – Wrap the taffy in wax paper for a cute homemade candy gift.
Recipe
Ingredients
- 2 cups granulated sugar
- 2 tablespoons cornstarch
- 1 cup light corn syrup
- ¾ cup water
- 2 tablespoons unsalted butter
- 1 teaspoon salt
- 1 teaspoon vanilla extract (or any other flavoring of choice!)
- A few drops of food coloring (optional, for colorful taffy!)
Directions
Step 1: Prepare the Baking Sheet
- Line a baking sheet with parchment paper and lightly grease it with butter or nonstick cooking spray.
Step 2: Cook the Taffy Mixture
- In a large saucepan over medium heat, whisk together sugar and cornstarch.
- Add corn syrup, water, butter, and salt, stirring until everything is well combined.
- Bring the mixture to a boil, then stop stirring and let it cook undisturbed.
Step 3: Reach the Hard Ball Stage
- Use a candy thermometer and cook until the temperature reaches 255°F (hard ball stage).
- Once it reaches the right temperature, remove the saucepan from heat immediately.
Step 4: Add Flavor & Color
- Stir in vanilla extract (or any other flavoring) and a few drops of food coloring for a fun twist.
- Pour the hot taffy mixture onto the prepared baking sheet and let it cool until safe to handle (about 5-10 minutes).
Step 5: Pull the Taffy
- Butter your hands to prevent sticking, then stretch and pull the taffy repeatedly for 10-15 minutes.
- As you pull, the taffy will become lighter in color, firmer, and stretchier—this aeration process gives it its signature chewy texture!
Step 6: Shape & Cut
- Once the taffy is firm but still pliable, roll it into long ropes about ½-inch thick.
- Cut into bite-sized pieces using buttered scissors or a sharp knife.
Step 7: Wrap & Store
- Wrap each piece in wax paper, twisting the ends to seal.
- Store in an airtight container at room temperature for up to 2 weeks.
Serving and Storage Tips
How to Serve:
- Enjoy as a chewy snack anytime!
- Pack them into gift bags or candy jars for a cute homemade gift.
- Serve at parties, baby showers, or as a nostalgic treat.
How to Store:
- Room Temperature: Keep in an airtight container for up to 2 weeks.
- Avoid Humidity: Store in a cool, dry place to prevent stickiness.
- Freezing: Not recommended, as taffy can become too hard.
Helpful Notes
- Work Quickly When Pulling! – As the taffy cools, it becomes harder to pull. Butter your hands and stretch fast!
- No Candy Thermometer? – Drop a small amount of the hot mixture into cold water. If it forms a firm but bendable ball, it’s ready.
- Mix & Match Flavors – Try peppermint, strawberry, banana, or coconut extracts for different flavors.
- Use Different Colors – Make a rainbow batch by dividing the taffy and using multiple food colorings.
- Prevent Sticky Taffy – If the pieces stick together, dust them lightly with powdered sugar before wrapping.
frequently asked questions
1. Why is my taffy too hard?
If your taffy is too hard, it was likely cooked above 255°F. Next time, remove it from heat as soon as it reaches 255°F.
2. Why is my taffy too soft and sticky?
If the taffy is too soft, it wasn’t cooked hot enough. Make sure you reach 255°F (hard ball stage) for the right consistency.
3. How do I clean up hardened taffy from the pan?
Fill the pan with hot water and let it sit for 5-10 minutes—the sugar will dissolve, making cleanup easy!
4. Can I make this without corn syrup?
Corn syrup helps prevent the sugar from crystallizing. If substituting, try honey or golden syrup, but note that the texture may be slightly different.
5. What’s the best way to wrap homemade taffy?
Use wax paper or parchment paper and twist the ends. Avoid plastic wrap, as it sticks to the taffy.
Final Thoughts
Homemade Saltwater Taffy is a fun, nostalgic, and totally satisfying candy to make at home! With its soft, chewy texture and endless flavor possibilities, it’s the perfect treat for candy lovers of all ages.
The best part? Pulling the taffy is a hands-on activity that brings family and friends together for a delicious and memorable experience!
So grab your sugar, butter, and flavoring, and get ready to enjoy the sweet magic of homemade taffy!

Homemade Saltwater Taffy
Ingredients
- 2 cups granulated sugar
- 2 tablespoons cornstarch
- 1 cup light corn syrup
- ¾ cup water
- 2 tablespoons unsalted butter
- 1 teaspoon salt
- 1 teaspoon vanilla extract or any other flavoring of choice!
- A few drops of food coloring optional, for colorful taffy!
Instructions
Step 1: Prepare the Baking Sheet
- Line a baking sheet with parchment paper and lightly grease it with butter or nonstick cooking spray.
Step 2: Cook the Taffy Mixture
- In a large saucepan over medium heat, whisk together sugar and cornstarch.
- Add corn syrup, water, butter, and salt, stirring until everything is well combined.
- Bring the mixture to a boil, then stop stirring and let it cook undisturbed.
Step 3: Reach the Hard Ball Stage
- Use a candy thermometer and cook until the temperature reaches 255°F (hard ball stage).
- Once it reaches the right temperature, remove the saucepan from heat immediately.
Step 4: Add Flavor & Color
- Stir in vanilla extract (or any other flavoring) and a few drops of food coloring for a fun twist.
- Pour the hot taffy mixture onto the prepared baking sheet and let it cool until safe to handle (about 5-10 minutes).
Step 5: Pull the Taffy
- Butter your hands to prevent sticking, then stretch and pull the taffy repeatedly for 10-15 minutes.
- As you pull, the taffy will become lighter in color, firmer, and stretchier—this aeration process gives it its signature chewy texture!
Step 6: Shape & Cut
- Once the taffy is firm but still pliable, roll it into long ropes about ½-inch thick.
- Cut into bite-sized pieces using buttered scissors or a sharp knife.
Step 7: Wrap & Store
- Wrap each piece in wax paper, twisting the ends to seal.
- Store in an airtight container at room temperature for up to 2 weeks.
Notes
- Work Quickly When Pulling! – As the taffy cools, it becomes harder to pull. Butter your hands and stretch fast!
- No Candy Thermometer? – Drop a small amount of the hot mixture into cold water. If it forms a firm but bendable ball, it’s ready.
- Mix & Match Flavors – Try peppermint, strawberry, banana, or coconut extracts for different flavors.
- Use Different Colors – Make a rainbow batch by dividing the taffy and using multiple food colorings.
- Prevent Sticky Taffy – If the pieces stick together, dust them lightly with powdered sugar before wrapping.

