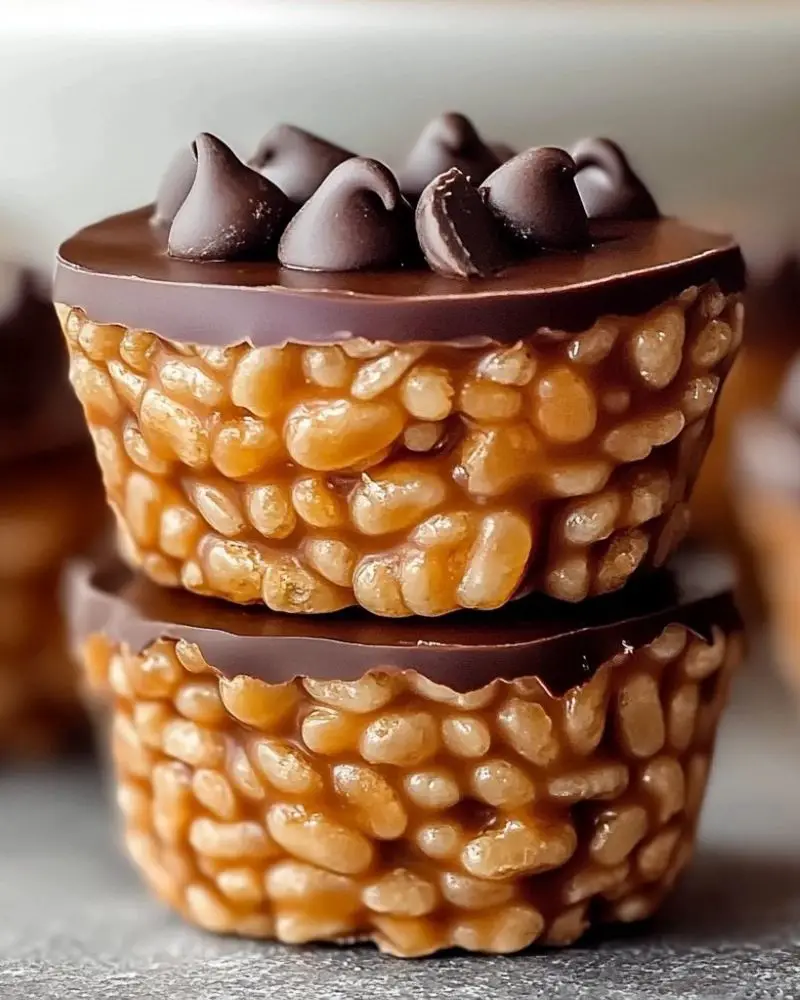
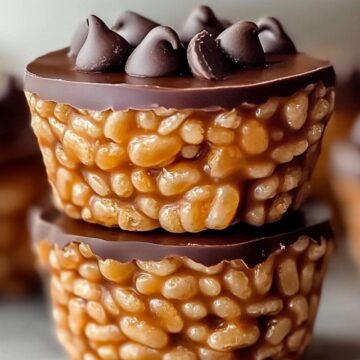
You know that feeling when you want something sweet right now—but you don’t want to bake, and you definitely don’t want a pile of dishes? That’s exactly how these Chocolate Peanut Butter Rice Krispie Cups came into my life. One afternoon, with a sweet tooth and a mostly empty pantry, I threw together what I had: Rice Krispies, peanut butter, chocolate chips. The result? Pure magic.
These little cups have become a go-to recipe in my kitchen for everything from lunchbox treats to last-minute party desserts. They hit all the right notes: chewy, crunchy, sweet, salty, and chocolatey—all in one perfect bite.
Why You’ll Love This Recipe
- No-Bake & Fuss-Free: No oven, no problem—just melt, mix, and chill.
- Ready in 45 Minutes: Including chill time!
- Kid-Friendly: Perfect for little hands to help make—and eat.
- Customizable: Add toppings, switch nut butters, or make them dairy-free.
- Perfect for Parties: Bite-sized, portable, and crowd-pleasing.
- Sweet & Salty Perfection: A drizzle of sea salt takes them over the top.
Ingredients You'll Need
For the Base:
- 3 cups Rice Krispies cereal
- ½ cup peanut butter (creamy) – natural or shelf-stable both work
- ½ cup honey or corn syrup – for sweetness and binding
- ¼ cup brown sugar – adds depth and chewiness
- 1 teaspoon vanilla extract
For the Chocolate Topping:
- 1 cup semisweet chocolate chips
- 2 tablespoon peanut butter – makes the topping silky smooth
Optional:
- Mini chocolate chips or flaky sea salt – for sprinkling on top
Substitutions:
- Use almond or sunflower seed butter if peanut allergies are a concern.
- Maple syrup works in place of honey for a slightly different flavor.
- Dairy-free chocolate chips for a vegan option.
Step-by-Step Instructions
1. Make the Base
In a medium saucepan over medium heat, combine honey (or corn syrup) and brown sugar. Stir constantly until the sugar dissolves and the mixture just begins to bubble.
Tip: Don’t overboil—just let it get hot enough to melt the sugar.
2. Stir in the Peanut Butter
Remove the pan from heat and immediately stir in the peanut butter and vanilla extract until the mixture is smooth and creamy.
Tip: Work quickly so the mixture stays pourable for the next step.
3. Add the Rice Krispies
Pour the Rice Krispies into the warm peanut butter mixture and stir gently until all the cereal is fully coated.
Tip: Use a silicone spatula or greased spoon for easier mixing and cleanup.
4. Fill the Muffin Tins
Lightly grease or line a mini muffin tin. Spoon the mixture into each cup, pressing down gently with a greased spoon or your fingers to compact it.
Tip: A lightly oiled spoon helps prevent sticking and keeps things tidy.
5. Make the Chocolate Topping
In a microwave-safe bowl, combine the chocolate chips and 2 tablespoons peanut butter. Microwave in 30-second intervals, stirring in between, until smooth and melted.
Tip: Be careful not to overheat—stirring frequently ensures silky results.
6. Top and Chill
Spoon the melted chocolate mixture over the Rice Krispie cups and smooth out the tops. Sprinkle with mini chocolate chips or flaky sea salt if desired.
Refrigerate for at least 30 minutes until fully set. Once chilled, pop the cups out of the muffin tin and store them in an airtight container.
Serving and Storage Tips
These little cups are best enjoyed slightly chilled or at room temperature for the perfect chewy-meets-crunchy texture. Serve them on a dessert platter, pack them into lunchboxes, or stash a few in the fridge for late-night snacking.
Storage: Keep them in an airtight container in the fridge for up to 1 week. You can also freeze them for up to 2 months—just thaw at room temp for 15–20 minutes before serving.
Presentation Idea: For parties or gifting, pop each cup into a mini cupcake liner and place in a gift box or tin.
Helpful Notes
- Grease Your Tools: A light coat of oil on your spoon or hands makes pressing the mixture into muffin tins much easier.
- Adjust the Sweetness: Prefer it less sweet? Cut the brown sugar to 2 tablespoons and increase peanut butter slightly.
- Add a Crunch: Mix in chopped nuts or crushed pretzels for extra texture.
- Make it Vegan: Use maple syrup or agave instead of honey, and vegan chocolate chips for a fully plant-based treat.
Frequently Asked Questions
- Can I use chunky peanut butter instead of creamy?
Yes! It adds extra crunch and texture. Just make sure it’s not too dry or the mixture may not bind well. - What if I don’t have a mini muffin tin?
You can use a regular muffin tin for larger portions or press the mixture into a lined 8x8 pan and cut into squares once set. - Is it okay to use natural peanut butter?
Definitely! Just stir well before using to make sure the oils are incorporated and the consistency is smooth. - Can I make these nut-free?
Yes. Use sunflower seed butter and double-check that your cereal and chocolate are nut-free certified. - Why are my cups falling apart?
Make sure the sugar mixture is heated until it bubbles gently—this activates the binding. Also, press the mixture firmly into the tin before chilling. - Can I add toppings besides chocolate chips?
Absolutely! Try sprinkles, crushed nuts, mini marshmallows, or even a drizzle of caramel for a fun twist.
Final Thoughts
If you’re looking for a no-fuss dessert that delivers big on flavor and texture, these Chocolate Peanut Butter Rice Krispie Cups are calling your name. They’re chewy, crunchy, sweet, and a little salty—everything you could want in a bite-sized treat.
Perfect for kids, parties, or simply stashing in the fridge for snack emergencies, they’re the kind of treat you’ll want to make on repeat.
Chocolate Peanut Butter Rice Krispie Cups
Ingredients
For the Base:
- 3 cups Rice Krispies cereal
- ½ cup peanut butter creamy – natural or shelf-stable both work
- ½ cup honey or corn syrup – for sweetness and binding
- ¼ cup brown sugar – adds depth and chewiness
- 1 teaspoon vanilla extract
For the Chocolate Topping:
- 1 cup semisweet chocolate chips
- 2 tablespoon peanut butter – makes the topping silky smooth
Optional:
- Mini chocolate chips or flaky sea salt – for sprinkling on top
Instructions
Make the Base
- In a medium saucepan over medium heat, combine honey (or corn syrup) and brown sugar. Stir constantly until the sugar dissolves and the mixture just begins to bubble.
Stir in the Peanut Butter
- Remove the pan from heat and immediately stir in the peanut butter and vanilla extract until the mixture is smooth and creamy.
Add the Rice Krispies
- Pour the Rice Krispies into the warm peanut butter mixture and stir gently until all the cereal is fully coated.
Fill the Muffin Tins
- Lightly grease or line a mini muffin tin. Spoon the mixture into each cup, pressing down gently with a greased spoon or your fingers to compact it.
Make the Chocolate Topping
- In a microwave-safe bowl, combine the chocolate chips and 2 tablespoons peanut butter. Microwave in 30-second intervals, stirring in between, until smooth and melted.
Top and Chill
- Spoon the melted chocolate mixture over the Rice Krispie cups and smooth out the tops. Sprinkle with mini chocolate chips or flaky sea salt if desired.
- Refrigerate for at least 30 minutes until fully set. Once chilled, pop the cups out of the muffin tin and store them in an airtight container.
Notes
- Grease Your Tools: A light coat of oil on your spoon or hands makes pressing the mixture into muffin tins much easier.
- Adjust the Sweetness: Prefer it less sweet? Cut the brown sugar to 2 tablespoons and increase peanut butter slightly.
- Add a Crunch: Mix in chopped nuts or crushed pretzels for extra texture.
- Make it Vegan: Use maple syrup or agave instead of honey, and vegan chocolate chips for a fully plant-based treat.

