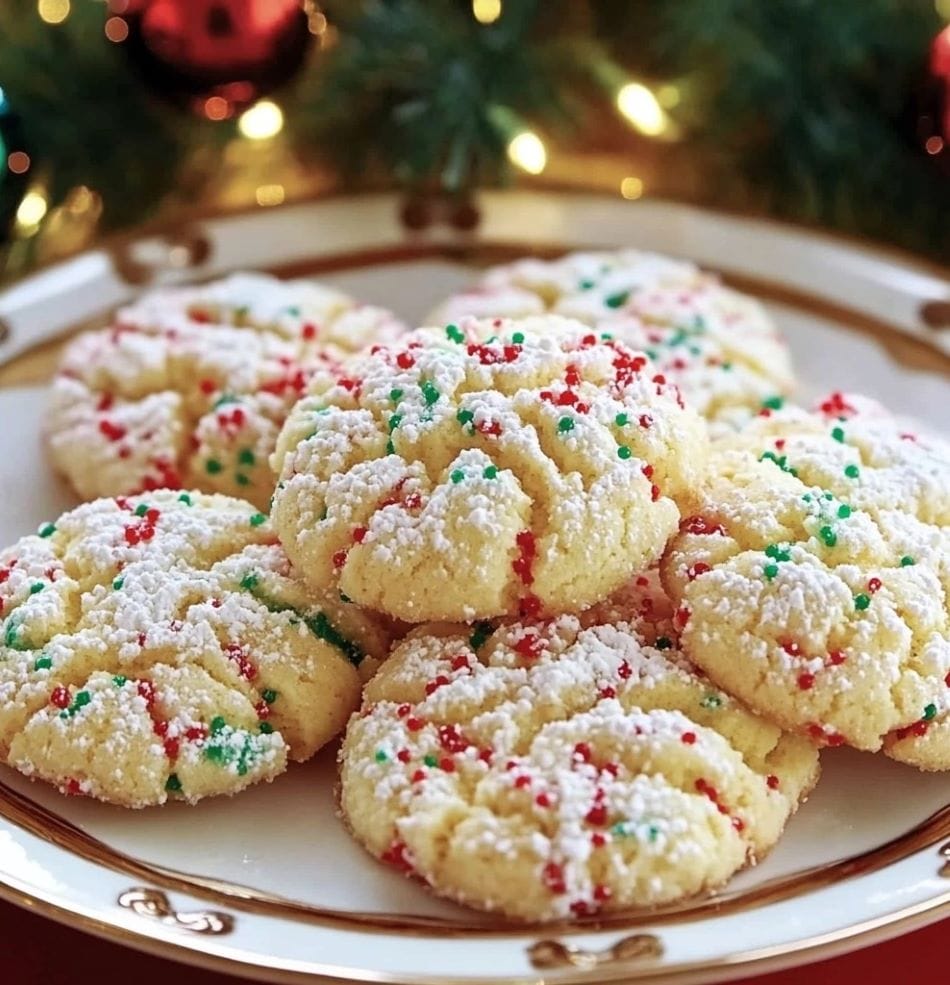
These Christmas Ooey Gooey Butter Cookies are a festive, melt-in-your-mouth treat that’s perfect for the holiday season. With a soft, buttery texture and bursts of color from red and green sprinkles, they’re as fun to look at as they are delicious to eat. I love baking these cookies as part of my Christmas cookie lineup—they’re easy to make, have a unique, creamy texture, and bring that extra holiday cheer!
Why You’ll Like This Recipe
These Christmas Ooey Gooey Butter Cookies are incredibly soft and creamy, thanks to the cream cheese and butter. The yellow cake mix makes them sweet and full of vanilla flavor, while the festive sprinkles add a burst of holiday color. These cookies are simple to make, look beautiful on a holiday platter, and are sure to bring smiles to everyone who tries them.
Recipe: Christmas Ooey Gooey Butter Cookies
Ingredients
- ½ cup unsalted butter, softened
- 1 (8-ounce) package cream cheese, softened
- 1 large egg
- 1 teaspoon vanilla extract
- 1 box (15.25 ounces) yellow cake mix
- 1 cup powdered sugar
- Red and green sprinkles (for decorating)
Instructions
Step 1: Prepare the Dough
In a large mixing bowl, cream together the softened butter and cream cheese until smooth and creamy. Add the egg and vanilla extract, mixing until fully incorporated.
Step 2: Add the Cake Mix
Gradually add the yellow cake mix to the butter mixture, stirring until a soft dough forms. The dough will be slightly sticky, so chilling is recommended.
Step 3: Chill the Dough
Cover the dough and refrigerate for at least 30 minutes to make it easier to handle.
Step 4: Shape and Roll
Preheat your oven to 350°F (175°C). Scoop tablespoon-sized portions of dough and roll each one into a ball. Roll each ball in powdered sugar, coating it evenly, then add red and green sprinkles on top for a festive touch.
Step 5: Bake the Cookies
Place the dough balls on a baking sheet lined with parchment paper, spacing them about 2 inches apart. Bake for 10-12 minutes, or until the edges are set and the cookies have a crackled appearance.
Step 6: Cool and Serve
Allow the cookies to cool on the baking sheet for 5 minutes before transferring to a wire rack to cool completely. Enjoy these festive, gooey butter cookies!
Serving and Storage Tips
Serving:
Serve these cookies at room temperature for the best gooey texture. They’re perfect for holiday gatherings, cookie exchanges, or a sweet addition to your Christmas dessert spread.
Storage:
Store any leftovers in an airtight container at room temperature for up to 5 days. You can also freeze the dough balls for up to a month and bake them fresh when needed.
Helpful Notes
- Chill the Dough: Chilling the dough makes it easier to roll and helps the cookies maintain their shape while baking.
- Extra Sprinkles: Add a bit more holiday cheer by using Christmas-themed sprinkles or mixing in edible glitter for a sparkling touch.
- Powdered Sugar Coating: Roll the dough balls generously in powdered sugar before baking for the perfect crackle effect.
FAQs
Q1: Can I use a different flavor of cake mix?
Yes! Vanilla, lemon, or even red velvet cake mix can add unique flavors while keeping the same soft texture.
Q2: Can I make these cookies ahead of time?
Absolutely! You can prepare the dough and refrigerate it for up to 24 hours before baking, or freeze dough balls for up to a month.
Q3: Can I add other mix-ins like chocolate chips?
Definitely! Chocolate chips or white chocolate chunks can be added to the dough for an extra indulgent touch.
Q4: Can I make these cookies gluten-free?
Yes, simply use a gluten-free cake mix to make these cookies gluten-free. The texture and flavor will still be delicious.
Q5: How do I keep these cookies soft?
Storing them in an airtight container at room temperature will keep these cookies soft and gooey.
Final Thoughts
These Christmas Ooey Gooey Butter Cookies are the perfect festive treat, combining the creamy, rich flavor of cream cheese with the sweetness of cake mix. They’re soft, chewy, and beautifully decorated with holiday sprinkles, making them a joy to bake and share. Enjoy each gooey, delicious bite of this holiday favorite, perfect for the Christmas season. Happy baking!

Christmas Ooey Gooey Butter Cookies
Ingredients
- ½ cup unsalted butter softened
- 1 8-ounce package cream cheese, softened
- 1 large egg
- 1 teaspoon vanilla extract
- 1 box 15.25 ounces yellow cake mix
- 1 cup powdered sugar
- Red and green sprinkles for decorating
Instructions
Step 1: Prepare the Dough
- In a large mixing bowl, cream together the softened butter and cream cheese until smooth and creamy. Add the egg and vanilla extract, mixing until fully incorporated.
Step 2: Add the Cake Mix
- Gradually add the yellow cake mix to the butter mixture, stirring until a soft dough forms. The dough will be slightly sticky, so chilling is recommended.
Step 3: Chill the Dough
- Cover the dough and refrigerate for at least 30 minutes to make it easier to handle.
Step 4: Shape and Roll
- Preheat your oven to 350°F (175°C). Scoop tablespoon-sized portions of dough and roll each one into a ball. Roll each ball in powdered sugar, coating it evenly, then add red and green sprinkles on top for a festive touch.
Step 5: Bake the Cookies
- Place the dough balls on a baking sheet lined with parchment paper, spacing them about 2 inches apart. Bake for 10-12 minutes, or until the edges are set and the cookies have a crackled appearance.
Step 6: Cool and Serve
- Allow the cookies to cool on the baking sheet for 5 minutes before transferring to a wire rack to cool completely. Enjoy these festive, gooey butter cookies!
Notes
- Chill the Dough: Chilling the dough makes it easier to roll and helps the cookies maintain their shape while baking.
- Extra Sprinkles: Add a bit more holiday cheer by using Christmas-themed sprinkles or mixing in edible glitter for a sparkling touch.
- Powdered Sugar Coating: Roll the dough balls generously in powdered sugar before baking for the perfect crackle effect.

